 EUMETCastView
An EUMETCAST Viewer
EUMETCastView
An EUMETCAST Viewer
When you launch EUMETCastView, you should get a screen that looks like this:
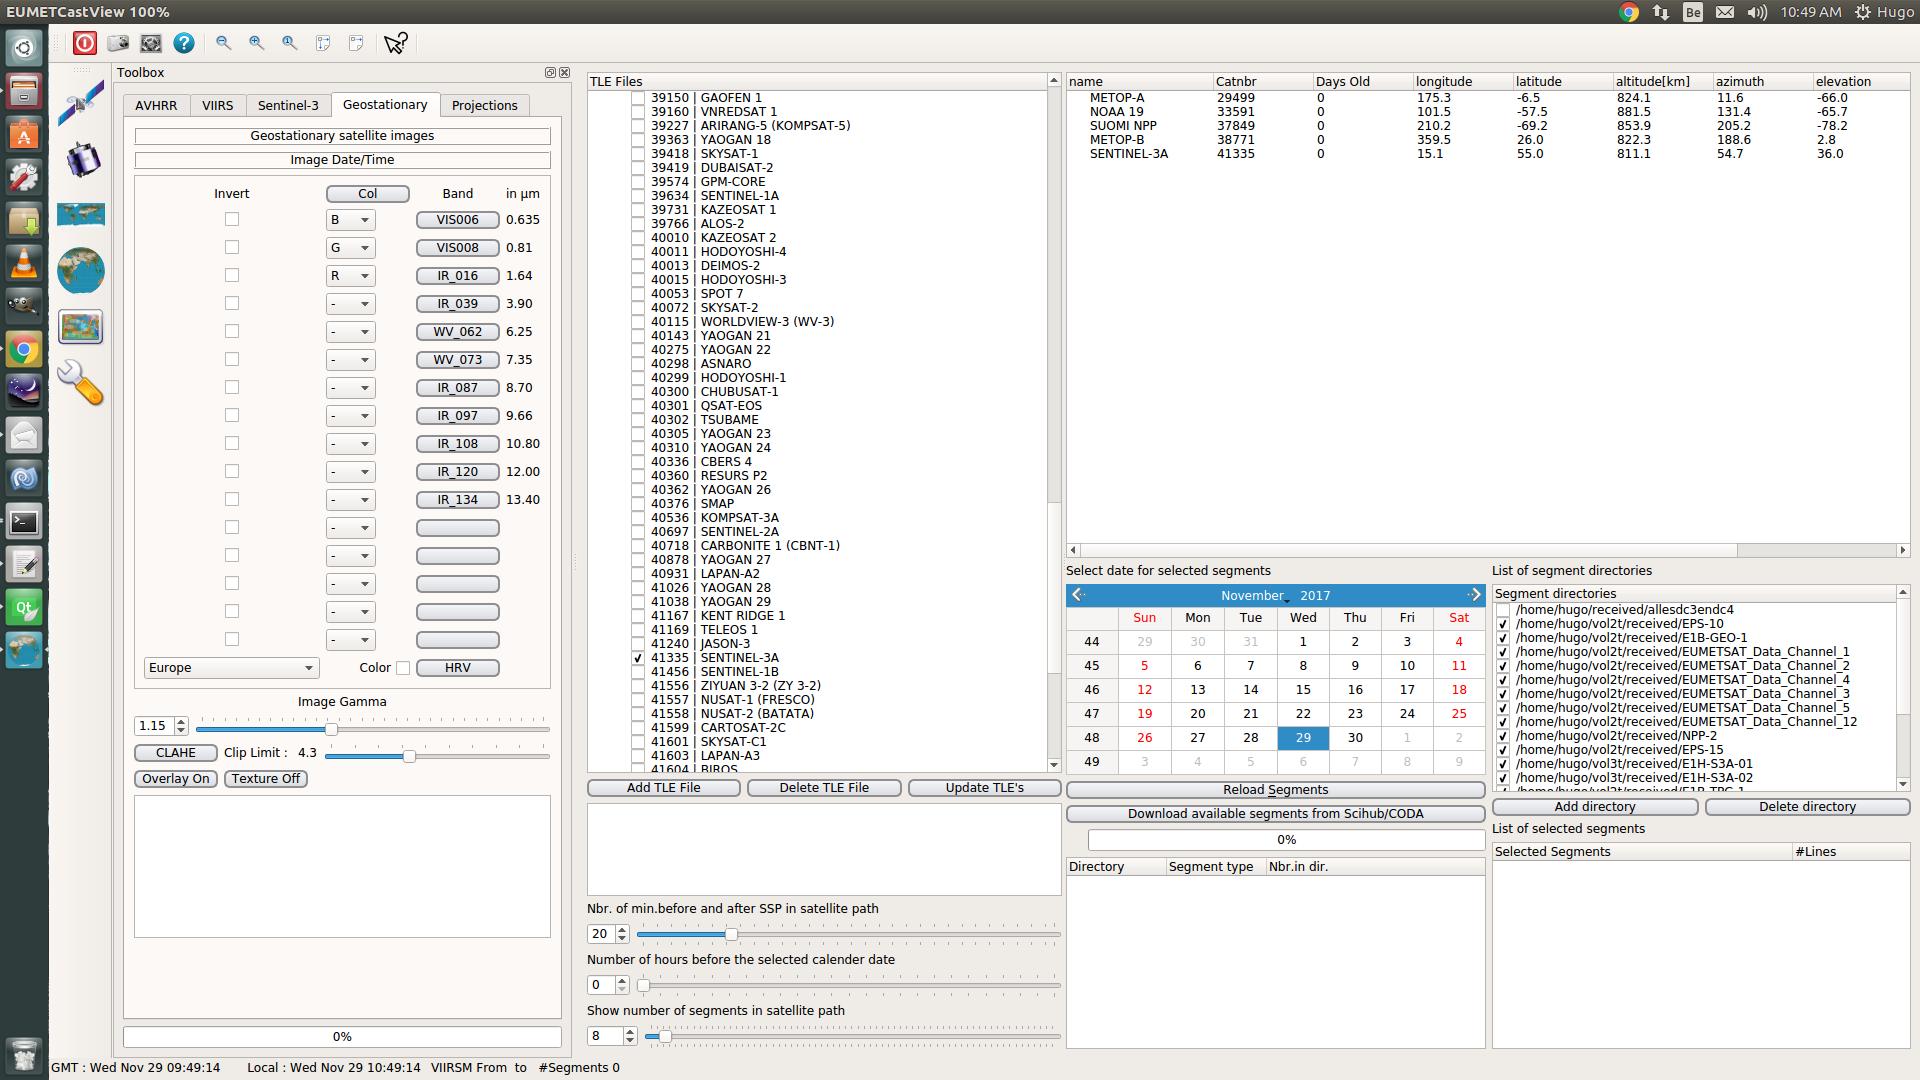
The screen is divided into three parts :
The toolbar allows you to select the different pages. At startup, the program will show the ‘Satellite Setup Page’.
The satellite setup page allows you to setup the different segment directories, selecting the date of segments to load and selecting the satellites in the Two Line Elements list.
The widget ‘List of segment directories’ displays the target directories
Satellite’s are selected in the ‘TLE Files’ widget. These selected satellites are displayed in the ‘Cylindrical Equidistant’ page and the ‘3D Globe’ page.
In the ‘Segment directories’ widget you can select which directories you want to load. By selecting a date in the calendar widget all the image segments information (not the image data itself) of all the selected directories are loaded in the program. This is used for displaying the positions of the image segments in the ‘Cylindrical Equidistant’ page and ‘3D Globe’ page.
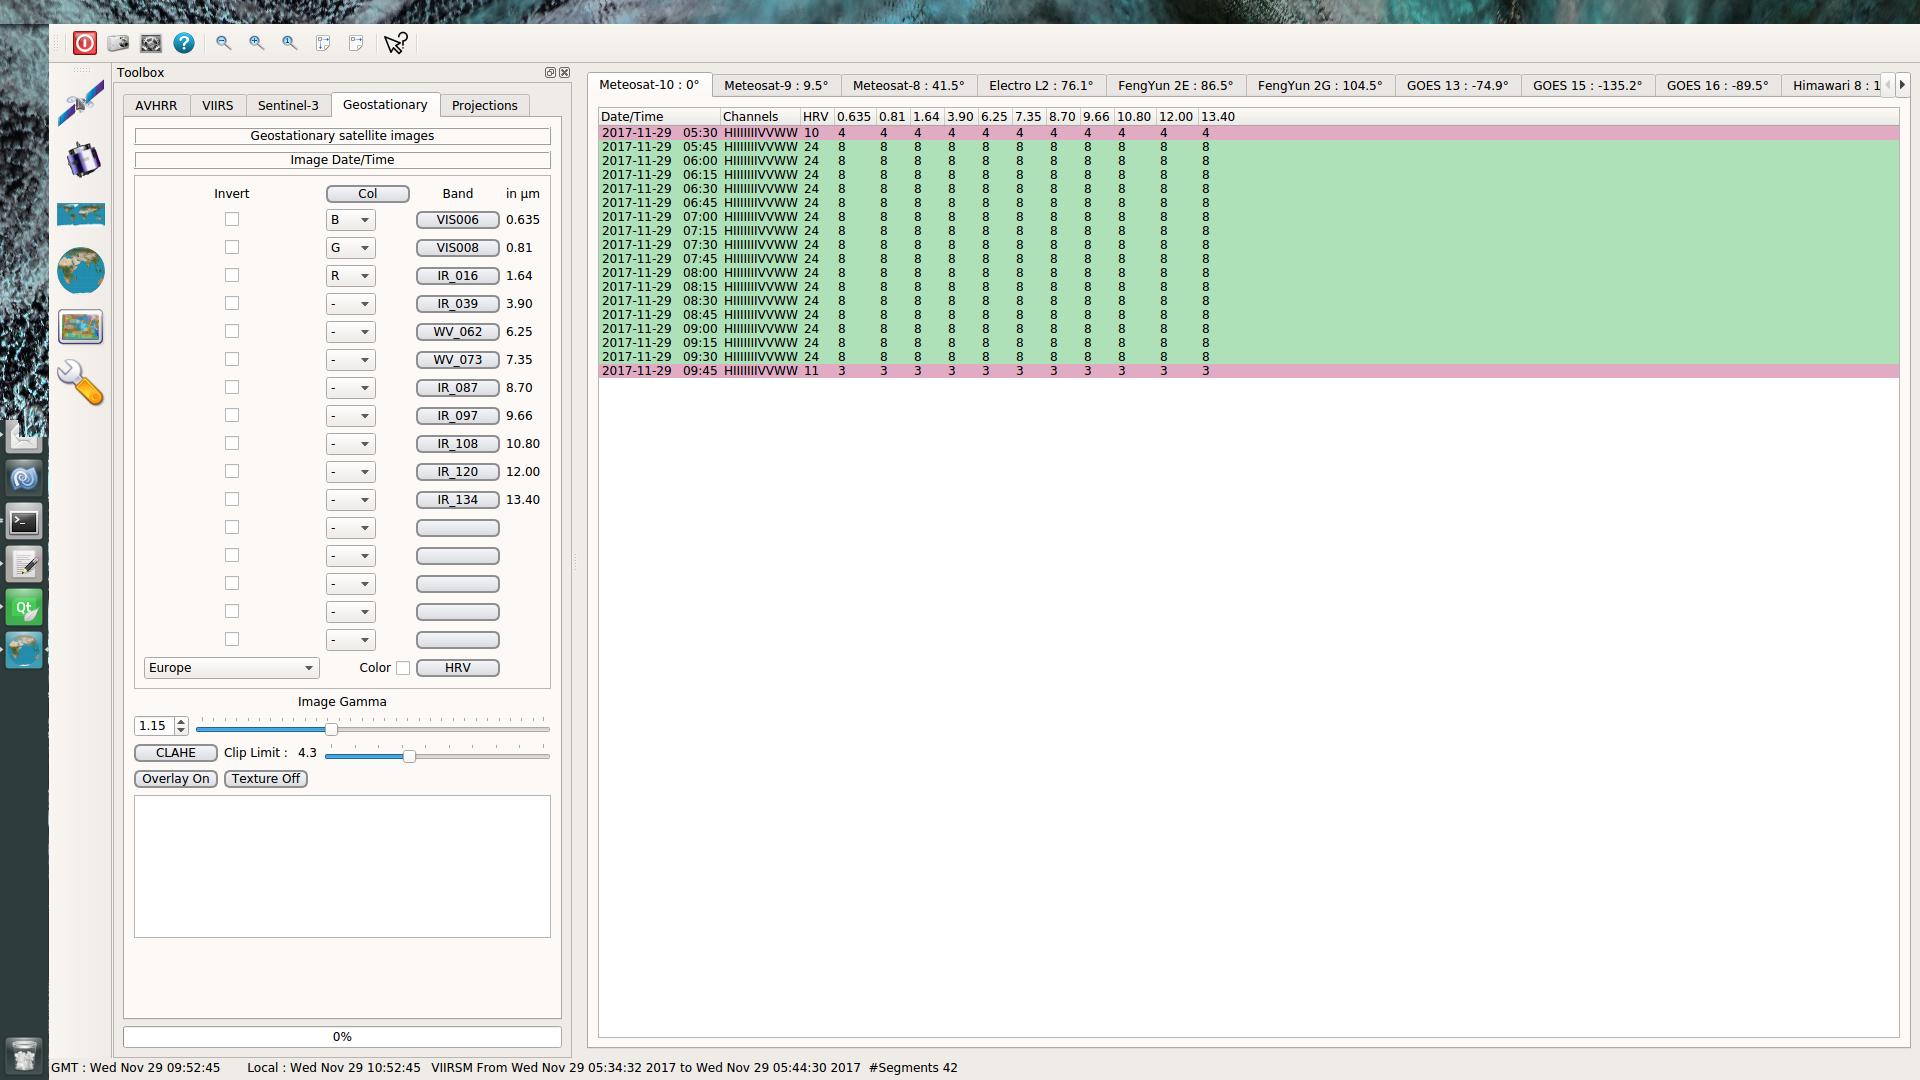
After loading the satellite segments information, an overview of the segments are displayed per satellite. The following geostationary satellites are available in EUMETCastView :
By clicking on an entry in one of the tabs you select the image by date and time to compile. The required channel is selected in the Toolbox.
In this page all the real time positions of the selected satellites are visible. At the bottom of the page you can select which segment tracks you want to see. The following polar satellite segment tracks are possible
To make a combined picture of the segments you right-click on the start of the segments ( yellow points along the red segment tracks ) to select them. The button ‘Make Image’ will render a combined satellite image. By moving the vertical scroll bar, the segment tracks will move over the cylindrical equidistant picture. A more straightforward method for selecting segments is possible in the ‘3D Globe’ page.
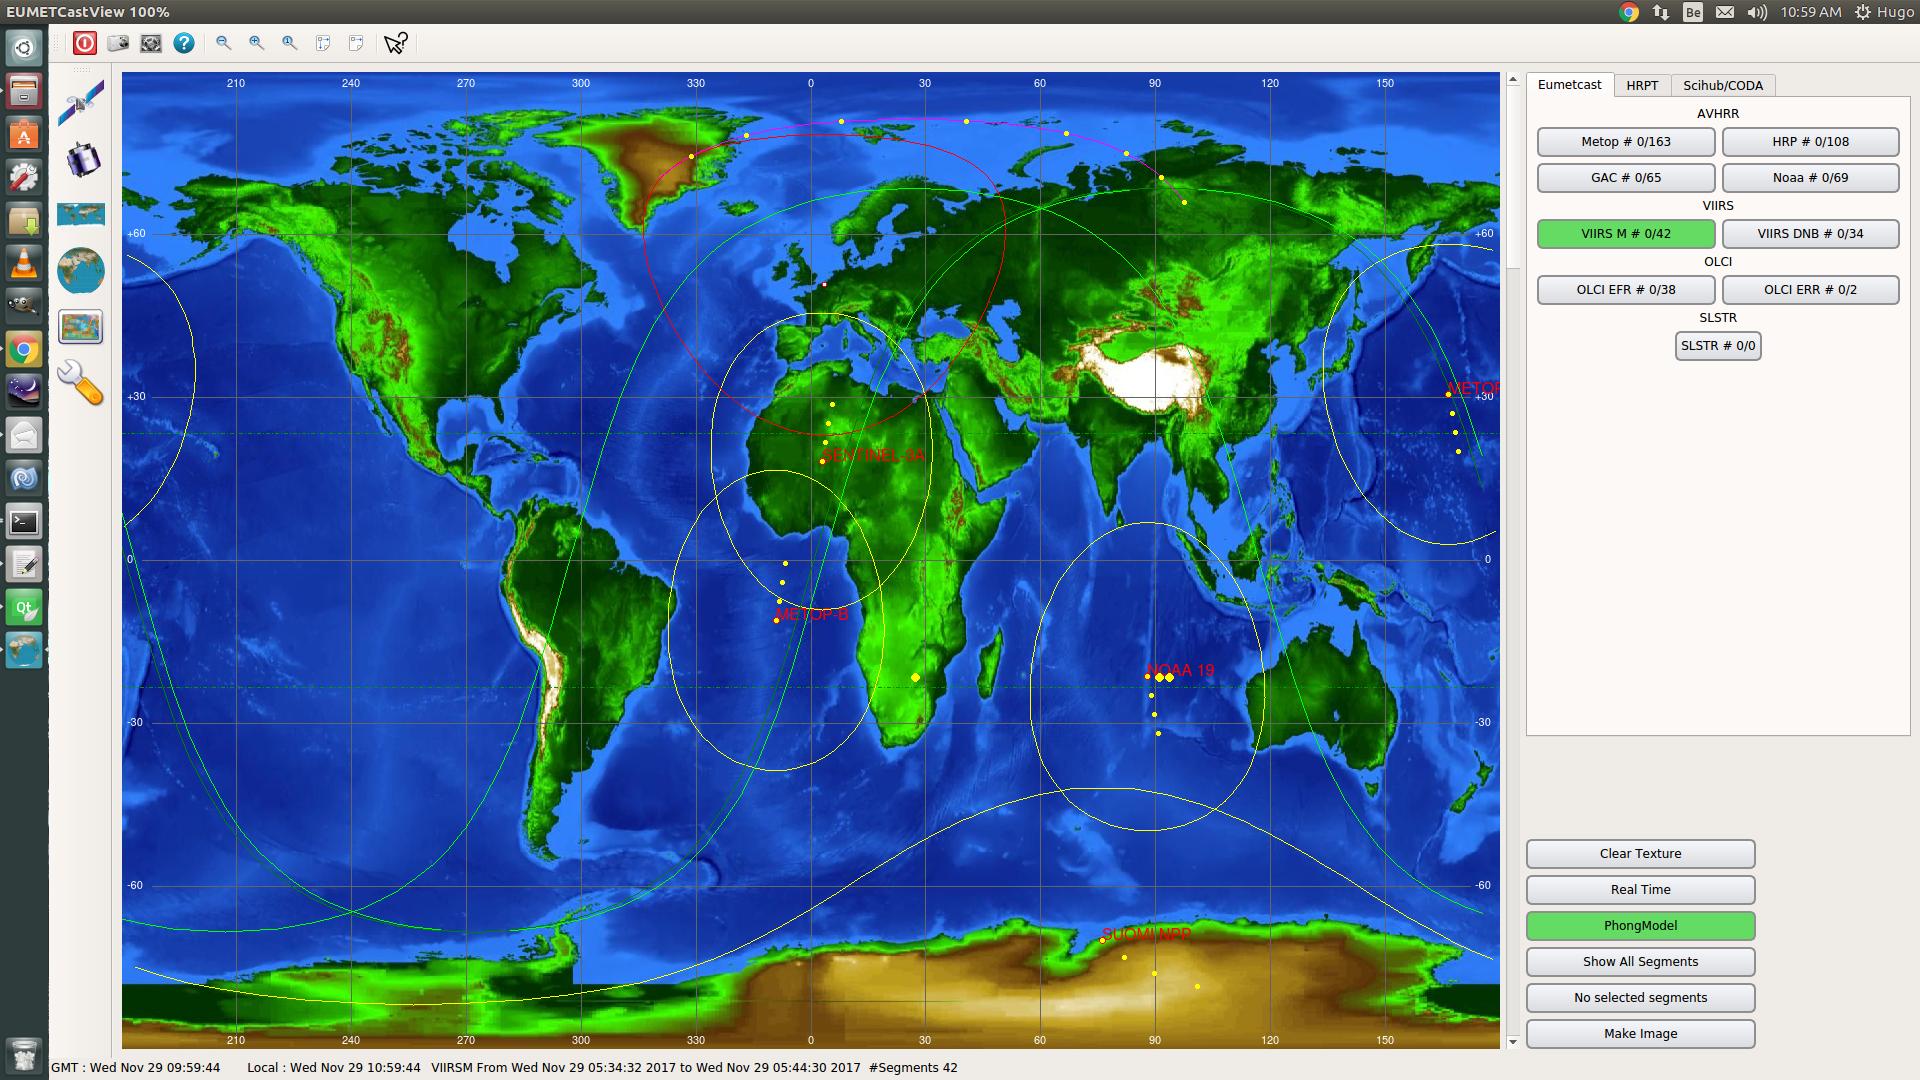
The 3D globe makes it easier to select the segments of interest. By right clicking in the boundery of the segment you can select or deselect this segment. By moving the vertical scroll bar on the right of the 3D globe, the segment tracks will move over the globe in function of time. Again, the button ‘Make Image’ will render the satellite image in the image page. When the button ‘Texture on’ in the toolbox page is set, the image will also be rendered to the texture of the 3D globe. You can toggle this button from ‘Texture On’ to ‘Texture Off’.

After rendering the image you can view it in the Image page.
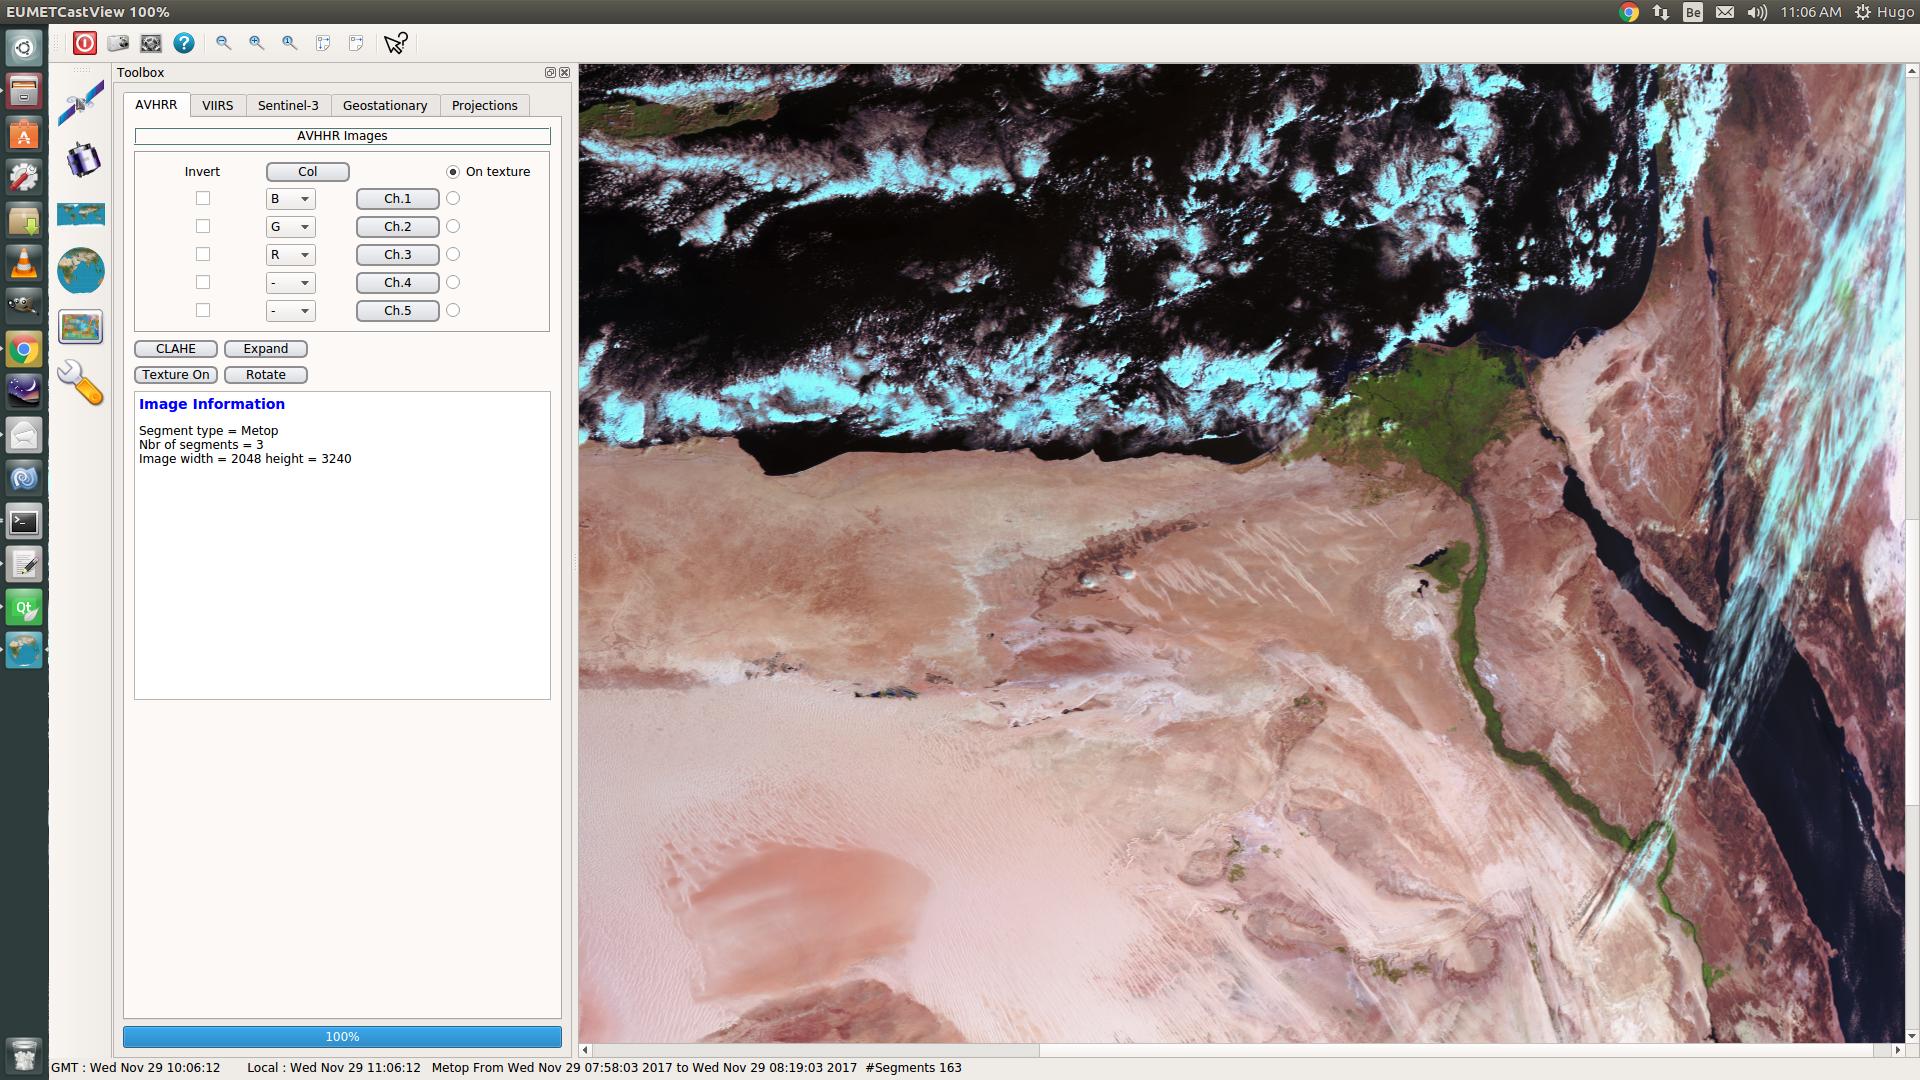
The Toolbox allows you to select which image you want to render.
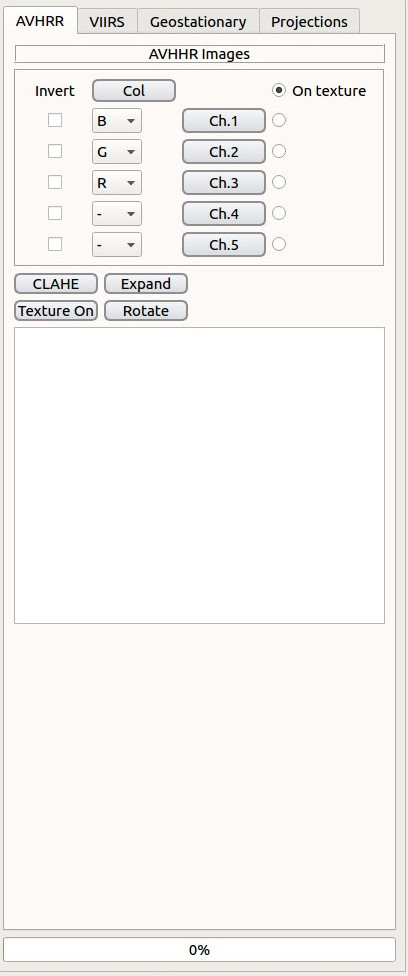
All the five channels of the AVHRR image are compiled at the same time. By clicking the channel button the chosen channel will be displayed. The color image is assembled when the image is compiled.
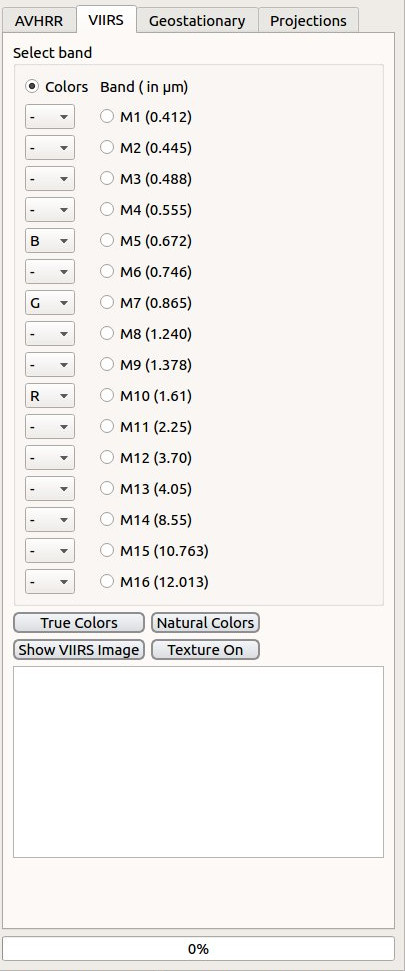
The selecting of the channels for VIIRS images is done in the VIIRS tab. By clicking on the button ‘Show VIIRS image’ the selected channel will be rendered.
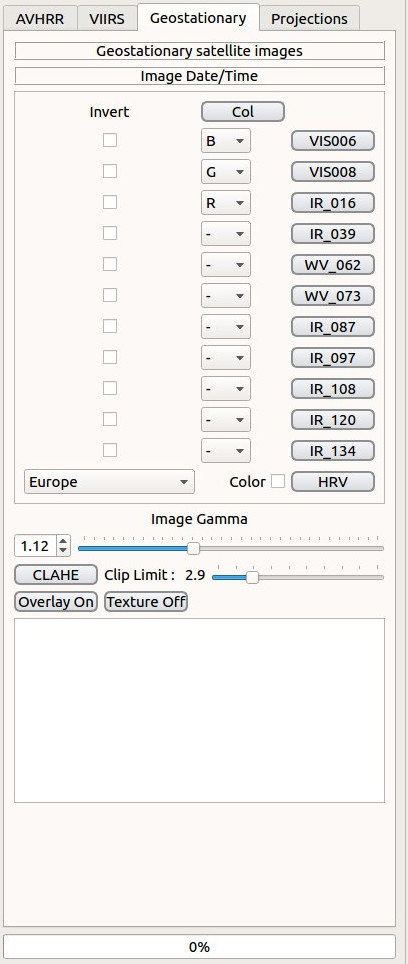
For geostationary images the available channel buttons will be enabled depending on the chosen geostationary satellite image.
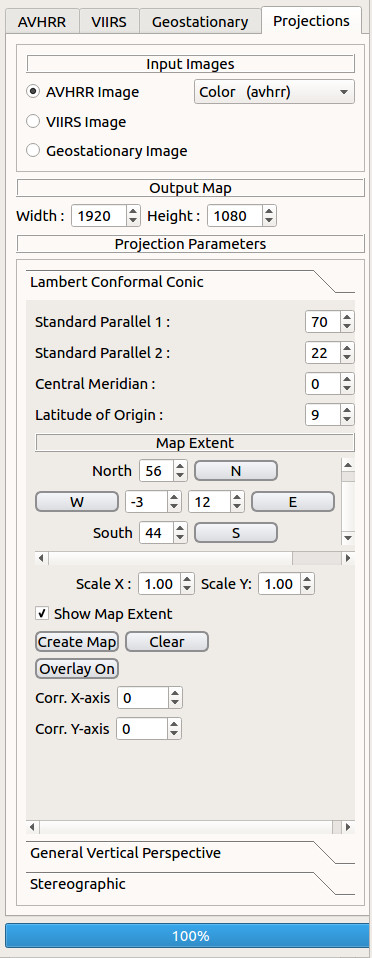
When an image is rendered ( AVHRR, VIIRS or geostationary ) it is possible to render a projection of this image. The following projections are possible :